Course: Main Course

  • Roast Chicken with Sauce Chasseur

    Roast Chicken Sauce Chasseur Recipe
    Victor Protasio
    Active Time
    40 MIN
    Total Time
    1 HR
    Yield
    Serves : 4

    Sauce Chasseur is classically thickened with a rich demi-glace, but this version uses cream which allows the flavors of the herbs, tomatoes, and acidic wine to come through.

    How to Make It

    Step 1    

    Preheat oven to 350°F. Heat oil in a 12-inch stainless steel ovenproof skillet over medium-high. Season chicken with salt and pepper. Sear chicken in skillet, skin side down, until skin is crisp and golden brown, about 4 minutes. Flip chicken; add shallots, cut sides down, and press into skillet. Cook chicken and shallots until shallots are browned, about 4 minutes. Add thyme and wine to skillet. Bring to a simmer over medium-high; add broth, and return to a simmer. Carefully transfer skillet (so skin of chicken stays dry) to preheated oven, and roast until thermometer inserted into thickest part of breast registers 155°F, about 20 minutes.

    Step 2    

    Remove skillet from oven. Using tongs, place chicken breasts and shallots on a plate; tent with aluminum foil to keep warm while making sauce. Pour broth mixture through a fine wire-mesh strainer into a heatproof bowl or measuring cup, and set aside. Wipe skillet clean, and return to high heat.

    Step 3    

    Melt butter in skillet, and add mushrooms in a single layer. Cook, without stirring, until browned on one side, about 2 minutes. Shake skillet to loosen mushrooms; cook, without stirring, until mushrooms just begin to release their juices, about 2 minutes. Add strained broth mixture and cream to skillet, and bring to a boil over high. Reduce heat to medium-low, and simmer, stirring occasionally, until mushrooms are tender and sauce is thick enough to coat the back of a spoon, 10 to 15 minutes. Remove from heat, and stir in tomato, chives, and tarragon; season with salt to taste.

    Step 4

    Slice chicken breasts crosswise into 1-inch-thick pieces. Divide chicken among plates, and serve with sauce chasseur.

    Suggested Pairing

    Herb-scented village Burgundy.
  • Pork Loin Braised with Mushrooms and Wine

    Pork Loin Braised with Mushrooms and Wine Recipe
    Greg DuPree
    Active Time
    1 HR 20 MIN
    Total Time
    50 MIN
    Yield
    Serves : 4

    Fistfuls of fresh herbs, fragrant strips of orange peel, and plenty of garlic perfume the wine-infused braising liquid penetrates this essential Corsican comfort food. The resulting jus is vibrant and richly seasoned; ladle extra over the polenta on each plate.

    How to Make It

    Step 1

    Preheat oven to 400°F. Sprinkle pork evenly with salt and pepper. Heat oil in a large ovenproof skillet or Dutch oven over medium-high.

    Step 2

    Add pork to pan; cook over medium-high, undisturbed, until golden brown on one side, about 3 minutes. Turn pork. Repeat until each side is browned, about 12 minutes. Remove pork from skillet, and set aside.

    Step 3

    Add mushrooms, onions, and garlic to pan; cook over medium-high, stirring often, until liquid from mushrooms has released and evaporated, about 8 minutes. Add wine; cook, scraping up browned bits from bottom of pan, until wine is reduced by half, about 5 minutes. Add stock, rosemary, and thyme; cook, undisturbed, 3 minutes. Return pork to pan. Cover, transfer to preheated oven, and roast until a thermometer inserted in thickest portion of meat registers 130°F, about 30 minutes.

    Step 4

    Remove pan from oven. Transfer pork to a cutting board; let rest 5 minutes. Meanwhile, add orange peel strips to mushroom mixture in pan. Bring to a boil over medium-high; boil until sauce has slightly thickened, about 3 minutes. Discard orange peel strips, rosemary, and thyme.

    Step
    Step 5

    Remove and discard twine from pork. Slice pork against the grain. Serve over polenta with mushroom mixture.

    Notes

    If you can’t find Corsican Muscat, you can substitute Moscato d’Asti.

    Suggested Pairing

    Aromatic Corsican white
  • Quarter Pounder Beet Burger

    OK, it’s burgertime!

    Beet Burgers


    • 1 1/4 cups cooked, cooled brown rice (see recipe notes above)
    • 1 cup cooked brown or green lentils, cooled, drained well
    • 1 cup shredded beets
    • 1/2 teaspoon salt
    • Fresh black pepper
    • 1 teaspoon thyme, rubbed between your fingers
    • 1/2 teaspoon ground fennel (or finely crushed fennel seed)
    • 1 teaspoon dry mustard
    • 3 tablespoons very finely chopped onion
    • 2 cloves garlic, minced
    • 2 tablespoons smooth almond butter
    • 1/2 cup very fine breadcrumbs

    Olive oil for the pan

    Peel beets and shred with the shredder attachment of your food processor, then set aside. Change the attachment to a metal blade. Pulse the brown rice, shredded beets and lentils about 15 to 20 times, until the mixture comes together, but still has texture. It should look a lot like ground meat:

    Ground beet

    Now transfer to a mixing bowl and add all the remaining ingredients. Use your hands to mix very well. Everything should be well incorporated, so get in there and take your time, it could take a minute or two.

    Place the mixture in the fridge for a half hour to chill.

    Preheat a cast iron pan over medium-high. Now form the patties. Each patty will be a heaping 1/2 cup of mixture. To get perfectly shaped patties, use a 3 1/2 inch cookie cutter or ring mold (I have pics of how to do it here.) Otherwise, just shape them into burgers with your hands.

    Pour a very thin layer of oil into the pan and cook patties for about 12 minutes, flipping occasionally. Do two at a time if you’re pan isn’t big enough. Drizzle in a little more oil or use a bottle of organic cooking spray as needed. Burgers should be charred at the edges and heated through.

    Serve immediately. But they taste pretty great heated up as well, so if you want to cook them in advance, refrigerate, then gently heat in the pan later on, then that is cool, too.

  • The Pizza Lab: How Long Should I Let My Dough Cold Ferment?

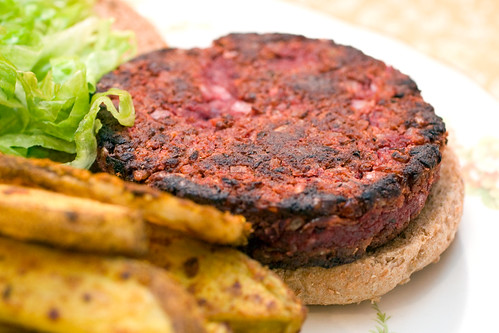
    Fermentation is a fascinating thing. At its most basic, it’s the act of using yeast (or occasionally other bacteria) to digest carbohydrates and convert them to alcohol and carbon dioxide (or occasionally other products, such as lactic acid). It’s what puts the sour into sauerkraut and the bubbles in Champagne. It’s what makes dried chorizo tangy and tea complex. It’s what makes you forget all of this neat stuff when you’ve had a bit too much beer. It’s also, of course, what gives a great pizza crust (and all yeast-leavened breads, for that matter) its light, airy structure and distinctive complex, slightly sour taste.

    So how exactly does it work? Let’s go through the basic steps of pizza dough to get an idea.

    • 1. Mixing/Kneading: Water, flour, salt, and yeast are first mixed together. During this stage, the two primary proteins found in flour (gliaden and glutenin) begin to interconnect, forming an elastic network. This protein network is called gluten, and it’s what gives bread its structure. As bread is kneaded, the strands of gluten align themselves and form wide, highly elastic sheets. Starch molecules suspended in this network also absorb water during this stage
    • 2. Rest/First Rise: During this stage, fermentation occurs. The yeast begins to digest carbohydrates, producing carbon dioxide, which causes air bubbles in the dough to inflate and swell. Meanwhile, gluten continues to strengthen, partially due to enzymatic action which shortens proteins and makes it easier for them to link up, and also due to the mechanical stretching that the slowly inflating bubbles cause
    • 3. Second Rise/Proof: After the first rise, the bread is shaped into balls or loaves for a final rise before baking. During this stage, the gluten, which is tense from the stretching it underwent during shaping loosens up, while the carbon dioxide bubbles continue to inflate. With pizza doughs, the risen ball is flattened and stretched immediately before baking, though care is taken to ensure that the ridge around the end of the crust (the cornicione) is not overly deflated
    • 4. Baking: As soon as the dough hits the hot oven, the air pockets inside it immediately start to expand, causing the dough to rapidly rise and inflate. Eventually, the gluten network is stretched to capacity. The heat of the oven causes the gluten to solidify, giving the bread structure. The exterior crust takes on color as the proteins and sugars undergo the Maillard reaction, a complex cascade of chemical reactions that produce the complex, toasted aroma of good bread

    experienced bakers and pizza-makers know that this is not the best way to make dough

    The warmer the dough is during fermentation, the faster the yeast multiply and produce carbon dioxide (carbon dioxide production rate maxes out at around 90°F). So with very simple recipes, this entire process can take place in just a few hours. But experienced bakers and pizza-makers know that this is not the best way to make dough. Though yeast produces carbon dioxide rapidly at high temperatures, it also produces undesirable flavors. Rather than tasting rich and complex, hastily made breads have the one-dimensional flat flavor of the flour, and sometimes even develop off flavors, like sour milk..

    So What’s the Solution? Retardation

    Retarding a dough is the act of placing it in a cold environment after it’s mixed in order to slow down the activity of the yeast. At cool fridge temperatures, yeast behaves differently, producing more of the desirable flavor compounds and fewer of the sour ones. It also produces carbon dioxide more slowly.

    Texture is also improved: Long fermentation times give the enzymes present in the flour more opportunities to cleave proteins (a process known as autolysis), making it easier for them to untangle, straighten out, and link up into gluten. Gluten structure is improved. Finally, the colder the dough when you shape it before the final proof, the fewer bubbles are forced out of it.

    Doughs that are shaped and proofed after a slow, cold fermentation demonstrate noticeably better flavor and better structure.

    20100923-pizza-lab-fermentation-crusts-days.jpg

    So what’s the ideal time-frame for a cold fermentation?

    To find out, I made a large batch of pizza dough and allowed it to cold-ferment in the fridge for 10 days. Each day (including the first before it went in the fridge), I pulled out a 6-ounce chunk of it, formed it into a ball, allowed it to proof at 70 degrees for 2 hours, stretched it into a 10-inch disk, and baked it using our skillet/broiler Neapolitan method.

    The results were quite interesting.

    Bubble, Bubble

    20100923-pizza-lab-fermentation-day-1.jpg

    This is the pie that was baked on the very first day. As you can see, it bakes to a relatively uniform shade of brown, and has a pretty tight, small-holed structure. This is not ideal. A perfect pizza should have a very airy, open texture in the cornicione, with a varied degree of browning, some spots sill pale blond, others brown, and still others nearly carbonized. It’s this contrast of colors that gives pizza crust interest and complexity.

    The flavor of the crumb was well-seasoned (the dough had a 1.5% salt content), but one dimensional.

    Even by the second day, there was a marked improvement in the crust flavor, though as far as browning went, it was still pretty uniform.

    By the third day, however, there were some pretty significant improvements. See this comparison:

    20100923-pizza-lab-fermentation-day-one-day-three-comp.jpg

    As you can see, the crust now runs the gamut from pale to black. But what’s the cause of this?

    I always figured it had something to do with a chemical conversion in the dough itself. Perhaps starches breaking down into sugars that brown more rapidly, or maybe something to do with the pH level changes caused by fermentation. But it didn’t quite make sense to me—if anything, lowering the pH (acidifying) would cause the bread to brown less well, not to form darker spots the way this crust was.

    Closer inspection revealed a much more likely scenario: Due to the way it aids in gluten development, slower fermentations create a better gluten structure, which in turn causes the dough to form larger, thinner bubbles.

    20100923-pizza-lab-fermentation-day-5.jpg

    This crust, from day 5, shows an even lighter structure, and even better blistering.

    Because of their low density, these blisters cook rapidly

    A one-day quick ferment—because of its lack of bubbles and the tightness of the dough—will form a smoother surface and tighter crumb as it cooks. Because it’s more dense, it takes a little longer to cook, and browns more evenly. The three day dough, on the other hand, upon entering the oven immediately starts blistering, stretching small sheets of gluten outwards. What this does is create localized areas of very thin, light dough. Because of their low density, these blisters cook rapidly, turning black before the bulk of the crust has a chance to brown deeply.

    That’s what causes the leopard-spotting in a properly fermented, properly baked Neapolitan pizza crust, and in fact, if you take a close look at a perfectly leopard-spotted pie, you’ll see that every black spot represents the surface of a tiny bubble that’s extended outward from the main bulk of the crust.

    When the dough is carefully stretched (see our Pieman’s Craft series for a good demo on how to do that), the effect of this blistering can be quite dramatic. Check out this perfectly charred bubble here!:

    20100923-pizza-lab-fermentation-16.jpg

    Take It To The Limit

    So does this mean that you can keep a ball of dough in your fridge indefinitely and that it will keep getting better and better as time goes on?

    No!

    Eventually, even at cold temperatures, the yeast will start produce a large amount of those sour milk aromas, throwing off the flavor of your bread. And there’s an even bigger problem: as the alcohol content and acidity of the dough rises, eventually it gets so high that the yeast simply cease to operate (it’s very similar to how I cease to operate once my alcohol content gets too high). At this stage, if you pull a ball of dough out of the fridge and onto the counter for the final proof before baking, nothing happens. The dough barely rises, and the structure of the bread suffers.

    The Short Answer: Three to Five Days

    If you’ve managed to get through all that dense, unleavened text, you’ve already got the answer to the titular question. For the rest of you who just skim (I know you’re out there),

    three to five days of cold fermentation is your best bet

    three to five days of cold fermentation is your best bet for dramatically improving your dough’s flavor, texture, and workability.

    In my fridge, which keeps at around 38°F, loss of quality started to occur around day 6. It continued to get worse and worse. By day 10, the pizza crusts showed barely any rise at all, and had a very distinct and off-putting sour flavor. Depending on your fridge, your timing might be a little different than mine, so it pays to experiment a bit. It’s easy—after you make the first batch of dough, all you have to do is shape and bake a pizza each day—and makes for an interesting week of pizza-eating.

    Given all this, does it mean that I’m never going to make a one-day pizza dough again? Absolutely not. But it does mean that if I can get myself to think ahead at least a bit (unlikely), I know a surefire way to improve my crusts in the future.

  • Pecan “Meatballs”

    This Pecan meatballs vegetarian recipe was also featured in our cooking class at Beloit SDA Church. This recipe uses soy cheese alternative.

    It is a very tasty dish.

    Pecan Meatballs Ingredients

    • 2 cups pecan meal
    • 2 cups bread crumbs
    • 2 cups grated cheese (soy cheese)
    • 1 teaspoon salt
    • 1 teaspoon garlic
    • 1 onion
    • 2 teaspoon sage
    • 2 cups of milk (soy)
    • 4 eggs

    Directions

    Mix dry ingredients together.

    Then add the milk and eggs.

    Form into balls and brown in pan with oil.

    They are ready to serve after cooling or freeze if you want.

    They will stick together so you will need to put them in sauce if using a slow cooker.

  • How to Barbecue Perfect Medium Rare Filet Mignon

    Perfectly Grilled Filet Mignon

    Filet mignon is the king of beef. It’s cut from the beef tenderloin, but it may also be in stores cut in steaks and labeled beef tenderloin (Filet mingon and beef tenderloin steaks are the same thing). For more information on how it’s cut and on the merits of grass-fed versus corn-fed filet, see my other article on filet mignon.

    I know some people like their beef well done, but, in my opinion, filet mignon should be served medium rare at 125 degrees. It’s best with a very simple presentation that lets its moist, fat-marbled taste stand out.

    Here is how to grill perfect filet mignon.

    Recipe for Filet Mignon on the Barbecue

    • Filet mignon steak, 1 ½ inches thick
    • Lightly drizzle with olive oil (optional)
    • Salt to taste (I prefer Kosher salt or coarse salt)
    • Pepper to taste

    * Note: Prime filet mignon vs choice cut filet are very similar. If just starting out grilling filet steaks, I recommend using the less expensive option of choice and waiting to do prime once you have the cooking technique mastered.

    Take the meat out of the refrigerator two hours before grilling. Getting the meat to room temperature will help it cook evenly. Never put filet mignon directly out of the refrigerator onto the grill because the steak won’t cook evenly.

    Put the filet mignon on a plate, drizzle with olive oil, crack fresh pepper onto it, and then add salt to both sides. I like to pat the seasoning gently into the meat with my hands.

    Getting the Grill Ready

    Heat the grill to (500 degrees), and scrub it with a wire brush if it’s dirty. Once it’s clean, spray it with a little oil to keep the filet from sticking to the grill.

    Sear the Steaks

    Filet Mignon Searing.  Notice how the flames are extending toward the grill and almost touching the steaks.
    Filet Mignon Searing. Notice how the flames are extending toward the grill and almost touching the steaks.

    Filet mignon needs to be grilled (that is, seared) at a high temperature. Using a pair of tongs, place the steak on the grill (it must be hot enough to make it sizzle right off) over high heat and close the lid. I cook it twice on each side, turning the steak three times total. This process creates grill marks on each side (see below). To cook a 1 ½ inch steak at 500 degrees to medium rare—and like I said, medium rare is the best—each turn on the grill should be no more than two and a half minutes long, for a total grilling time of ten minutes.

    In this example, I’m grilling Argentinian style, over small pieces of aged oak wood. This adds a smoky dimension to the meat. However, these instructions work great with a gas or charcoal grill which is what I typically use to cook filet mignon.

    How to Create Those Diamond Sear Marks

    Cross-Hatching on Filet Mignon
    Cross-Hatching on Filet Mignon

    Getting perfect crisscrosses on the steak takes a little practice. The hot grate brands the beef with the distinctive lines. Make sure the barbecue grate is fully heated before grilling. Try to grill each side about the same amount of time. When you flip the steaks, turn them 90 degrees, to get a new, intersecting set of lines.

    Beginners run into problems because they get to the end of the grilling session and realize the meat isn’t done. So they continue to grill and to avoid one side getting too done, they continue to flip the meat. The meat will likely taste delicious, but it won’t have the perfect presentation. The best way to get perfect sear marks is to know how hot your grill gets. It may require the burners set to medium-high heat or high heat to reach 500 degrees. If it’s a lot hotter than 500 degrees it will cook faster.

    Checking the Steak for Doneness

    My Thermapen Instant-Read Thermometer
    My Thermapen Instant-Read Thermometer

    How Long to Sear Steaks

    Desired Doneness
    Time Between Turnings
    Total Cooking Time
    Internal Temperature At Which To Remove Meat From Grill
    Resting Time After Grilling
    Medium rare
    2 1/2 min per side (then repeat)
    10 minutes
    120–125 degrees
    10 min
    Medium
    3 1/2 min per side (then repeat)
    12 minutes
    130 degrees
    10 min
    Well done
    3 1/2 min per side (then repeat)
    14 minutes
    140 degrees
    10 min
    Times on a 500-degree grill. The internal temperature will rise as the steak rests.

    To be sure of the temperature, use an instant-read thermometer (I use a Thermapen that’s used in labs). At the very end of the last two-and-a-half minute grilling period, insert the thermometer from the side of the steak and get a temperature reading. Even though USDA recommends a higher temperature for a medium-rare steak, I find pulling my steak off the grill at 120 to 125 degrees results in a perfect medium rare steak, just the way I like it—because after you pull it, it continues to cook, and the temperature continues to rise.

    Many purists think it’s sacrilegious to pierce a steak with a thermometer, for fear of losing all the succulent juices. While an insignificant dribble of juice will escape when the meat is pricked, using an accurate thermometer is well worth it, if, as a beginning griller, you want to know when to pull off your steak. Once you know your grill and its hot spots very well and have a good idea how long steaks take to grill, then you can gauge the internal temperature with a cooking timer. Until then, use an instant-read thermometer.

    Filet Needs to Rest Before Serving

    Once the meat is pulled from the grill, let it rest for ten minutes before serving. While the meat rests, the internal temperature typically rises an additional ten degrees. Lots of people overcook their meat because they think that pulling it off at 130 or 140 degrees will result in a medium rare steak. It won’t. It will result in a well-done little brick. If you want medium rare filet, pull it at 120 to 125 degrees.

    Perfectly Cooked Medium Rare Filet Mignon

    Perfectly cooked filet mignon should be pink from edge to edge, moist and delicious.

    Remember the keys to perfectly grilled filet mignon: start with room-temperature steak, heat the grill well, and use a meat thermometer.

    Now, it’s time to enjoy your dinner. I recommend pairing filet mignon with a full-bodied red wine. Cabernet Sauvignon is my favorite choice.

    Barbecued Filet Mignon Variations

    These classic variations will come out delicious on the grill if you follow the instructions above.

    Paul’s Sunday Special Filet Mignon Recipe

    • Filet mignon
    • Garlic salt to taste
    • Black pepper cracked to taste

    Paul’s Bacon-Wrapped Filet Mignon

    • “Petite” filet mignons (small fillets, 4–5 ounces apiece)
    • One strip of thick-cut bacon per fillet
    • Coarse salt and black pepper to taste
    • Toothpicks

    Season the steak, wrap the bacon around its circumference, and pin it together with a toothpick. Small fillets work best for this so the bacon wraps completely around the steak.

    Blue-Cheese-Stuffed Filet Mignon

    • Filet mignon
    • Garlic salt, seasoned salt, or truffle salt to taste
    • Cracked black pepper
    • Stilton blue cheese—about one tablespoon per steak
    • Toothpicks

    Season the steak with salt and pepper, and make a small slit in the side of the fillet about two inches wide that reaches past the center point of the steak. Stuff with about a tablespoon of blue cheese. Pin the edges of the steak back together with a toothpick.

    Buttered USDA Prime Filet Mignon aka Bob’s Favorite

    • Coarse salt and pepper to taste
    • Butter pad

    Season the steaks with Kosher or coarse salt and pepper to taste. During the last two minutes of grilling (gas grilling or charcoal), place a quarter-inch pad of butter on top of the steak and let it melt. Prime filet is extra rich and the added butter sends the richness through the roof!

  • The Lazy Cook’s Way to Great Black Beans

    That said, even lazy bean-cooks need some rules. I have two.

    1. Go for dried beans

    There’s a time and a place for canned beans, such as this amazing black bean soup that’s thinned out with chicken broth and enriched by partially puréeing the beans. But if you want a simple pot of whole beans in a rich, starchy gravy, the slow release of starch from dried beans is the best way to get there. Don’t worry—as long as you soak your beans ahead of time and cook them thoroughly, they won’t turn out tough.

    2. Don’t forget the aromatics

    Aromatics in a pot of black beans.

    Beans need a balance of aromatics to enhance and contrast their earthy flavor. For most cooks, that means starting with a simple mix of garlic and onion. I use these in abundance but also take a page from Cuban cuisine with the addition of an orange. Yes, a whole one: sliced in half, juice squeezed into the pot, and then I throw in the hulls, too. The orange simmers along with the beans, garlic, and onion, bringing a slightly floral, slightly citrusy sweetness to the broth. That peel adds a subtle bitterness that emphasizes the beans’ earthy flavor.

    One note: make sure to use a sweet juicing orange instead of a sour or bitter variety. Too much acidity can keep your beans from softening properly.

    How to Cook Dried Black Beans

    Close up of aromatics in pot of black beans.

    Update 9/11/14: In an earlier version of this post I mentioned soaking black beans to speed up their cooking time. But Kenji’s since shown that not soaking your beans beforehand actually improves their color, texture, and flavor, while only modestly increasing the cooking time (while saving you eight to 12 hours of soaking). So in true lazy cook fashion, rinse your beans, put them in a large pot with your garlic, onion, and orange, and cover them with several inches of water.

    Close up of cooked black beans.

    But wait? Shouldn’t you sauté your garlic and onion first for better flavor distribution first? Nope! I tested both options: sautéing garlic and onion in a little olive oil before adding beans and cooking, and cooking the beans with raw whole onion, garlic, and orange all at once. Tasters were evenly split on the two pots, with a slight preference for the beans that didn’t use pre-cooked aromatics.

    The way I see it, when you’re making pot beans, you’re making beans. The beans should be front and center. Sautéing the garlic and onion sweetened their flavors to the point where they walked all over the beans, and the oil in the pot brought the orange’s citrus sweetness to the fore when it should be a background player. At the end of the day, it’s a slight difference, but leaving your aromatics whole and raw means less prep time and marginally beanier beans.

    Overhead close up of black beans.

    Resist the urge to stop cooking them and let them simmer until they turn completely creamy. You want proper pot beans? Give them time.

    Once your beans are simmering, they don’t need much attention at all. Keep the heat low and the water level above their heads so they cook evenly. Stir them every now and then. But for the most part, dried beans cook themselves. At some point, the beans will seem “done,” but still somewhat al dente. Resist the urge to stop cooking them and let them simmer until they turn completely creamy. You want proper pot beans? Give them time. Just how long is hard to say, and depends on the age of your beans and some other factors. But I don’t start cooking dried beans without at least an hour to kill, and usually more like two or three.

    (Hey, I said this would be the laziest way. Not the fastest.)

    Once the beans are completely creamy, increase the heat a little to reduce the cooking liquid into a thick gravy, keeping in mind it’ll thicken more as the beans cool. Remove your onion and orange and add salt to taste now that the gravy is properly reduced. You’ll notice in these photos that some of the beans have blown out, a common sign of beans that haven’t been salted in a pre-cook soak. And you know what? That’s fine by me—they still taste great, and that extra starch thickens the sauce nicely.

    Now that you have your beans, it’s time to ask yourself the only hard question of the day: what do I serve them with?

    The answer: everything.